This article provides a tutorial to help you send an email from inside your iPhone application using the iPhone SDK built-in APIs.
The iPhone SDK provides the built-in MessageUI framework, which greatly simplifies the implementation of email functionality within an iOS application.
Creating a Simple Email UI
Create a simple app with a UI View Controller and call it the name, "SimpleEmailAppViewController". Then, add a button to the UIView by dragging it from the interface builder, and rename the button title to "Contact Us".
When the user taps the "Contact Us" button, the app will display the email user interface.
Making Connections to the User Interface
In order to make the connections from the "Contact Us" button to an action, you need to select the SimpleEmailAppViewController.xib file from the Project Navigator then go to the Interface Builder. Switch to the
Assistant Editor while hiding the Utility area. Once this is done, the interface and its corresponding code are displayed side by side. Next, press and hold the
key and click the "Contact Us" button and
drag it towards the "SimpleEmailAppViewController.h. As you place the pointer just below @interface and before the @end, and as you release the mouse button, you will notice a prompt that allows you to insert an outlet and action.
Select "Action" for "Connection" and enter "sendEmail" for "name" as shown below.
The event can be kept as "Touch Up Inside". When the user clicks the "Contact Us" button and lifts up the finger inside the button, it will result in invoking the "sendEmail" method. Once, you click Connect to confirm the changes, Xcode automatically adds the method declaration into "SimpleEmailAppViewController.h" file.
Implementing the Email Interface
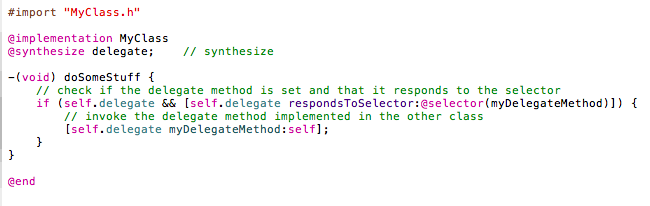
In "SimpleEmailAppViewController.h", implement the "MFMailComposeViewControllerDelegate" as shown below.
In "SimpleEmailAppViewController.m", implement the "sendEmail" method. Also, add the implementation for the delegate method, "MFMailComposeViewControllerDelegate". Note that we will also be utilizing the built-in API from the iOS SDK called "MFMailComposeViewController".
The "MFMailComposeViewController" class provides a standard interface to allow the editing, and composing of an email message. You can use this view controller to display a standard email view within your iOS application. We populate the fields of this view with initial values including the recipient email, subject and body of the message.
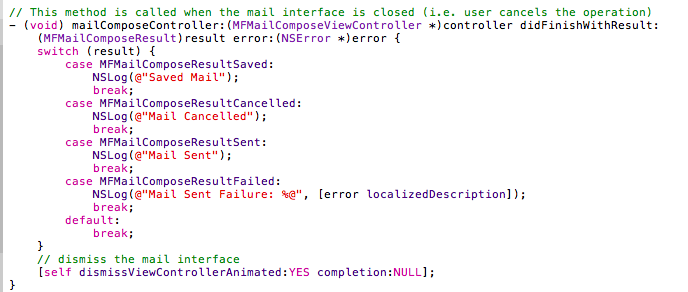
This view controller class also includes the following delegate method:
(void) mailComposeController:(MFMailComposeViewController *)controller
didFinishWithResult:(MFMailComposeResult)result error:(NSError *)error
This method is invoked when the user cancels the operation and the mail composition interface is dismissed. The result parameter tells you the result code when the mail composition interface is dismissed. In a real-world application, the app should display any errors that may occur if the app fails to send the email message.
Linking with the Message UI Framework
If you try to build the application, you will notice that you will get build errors. The "MFMailComposeViewController" class is built-in within the MessageUI framework.
To fix the compilation problem(s), you will need to add the MessageUI framework so that it is linked properly with your application. In the Project Navigator, select the "SimpleEmailApp" project and then select "SimpleEmailApp" target under Targets. Then, click "Build Phases" at the top of the project editor panel. Then, click on "Link Binary With Libraries" section.
Next, click the "+" button and select the "MessageUI framework". After you click the "Add" button, Xcode will include the MessageUI framework. This should fix your error(s), and you can now run your application. When you tap on the "Contact Us" button, it will display the email composition window with the pre-populated email content.
If you find this tutorial helpful, and would like to see more of these types of tutorials, then share a comment! Or if you have any other suggestions, do let me know as well. And follow me on twitter (@tasneemsayeed).